Hello,
Today we will create a spring boot CRUD application. In, this example, we are using the MySQL database to store data, to view and manage the data we will use react Js library in the frontend part. For API testing we will use Postman.
In this article, We will create a new employee record and save it to the database.
To do this, in the interface we will create the save() method. Like This way:
package com.crud.service;

import com.crud.entity.Employee;

public interface EmployeeService {
    Employee save(Employee employee);
}
Now, implement the save method in the EmployeeServiceImpl class. Using the EmployeeRepository we can use the JPA save overriding method to store records in the DB. Like this way:
package com.crud.serviceImpl;

import com.crud.entity.Employee;
import com.crud.repository.EmployeeRepository;
import com.crud.service.EmployeeService;
import org.springframework.beans.factory.annotation.Autowired;
import org.springframework.stereotype.Service;

@Service
public class EmployeeServiceImpl implements EmployeeService {

    @Autowired
    private EmployeeRepository employeeRepository;

    @Override
    public Employee save(Employee employee) {
        return employeeRepository.save(employee);
    }
}
Finally, in the controller class, create a method and annotated it with the @PostMapping(“/employees”). This method accepts the @RequestBody as an Employee object. and called the save method from the service interface. and return the employee object.
package com.crud.controller;


import com.crud.entity.Employee;
import com.crud.service.EmployeeService;
import org.springframework.beans.factory.annotation.Autowired;
import org.springframework.http.HttpStatus;
import org.springframework.http.ResponseEntity;
import org.springframework.web.bind.annotation.PostMapping;
import org.springframework.web.bind.annotation.RequestBody;
import org.springframework.web.bind.annotation.RequestMapping;
import org.springframework.web.bind.annotation.RestController;

@RestController
@RequestMapping("/api/v1")
public class EmployeeController {

    @Autowired
    private EmployeeService employeeService;

    @PostMapping("/employees")
    public ResponseEntity<Employee> createEmployee(@RequestBody Employee employee) {
        return new ResponseEntity<Employee>(employeeService.save(employee), HttpStatus.CREATED);
    }

}
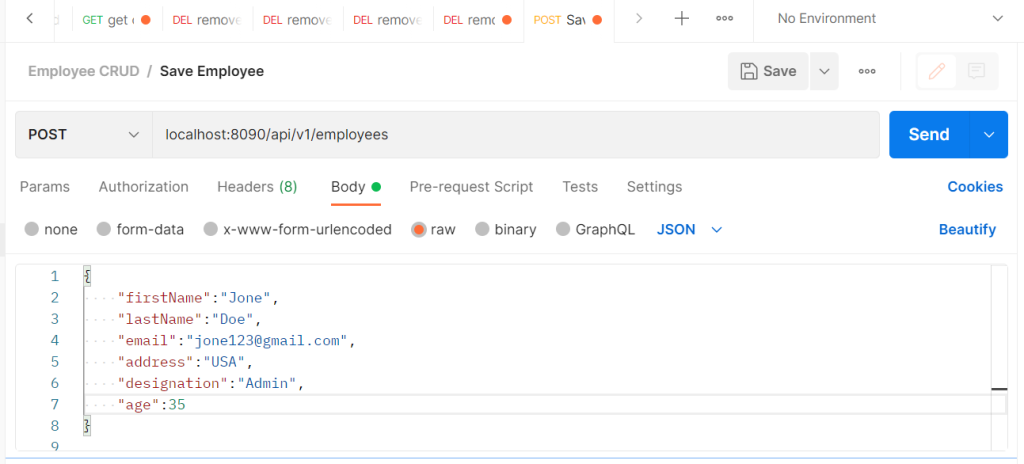
Now run the application and open the postman. In postman, test it this way:
Pass the required fields and values in the JSON format. Then click the send Button.
After sending the request, the response should be like this:
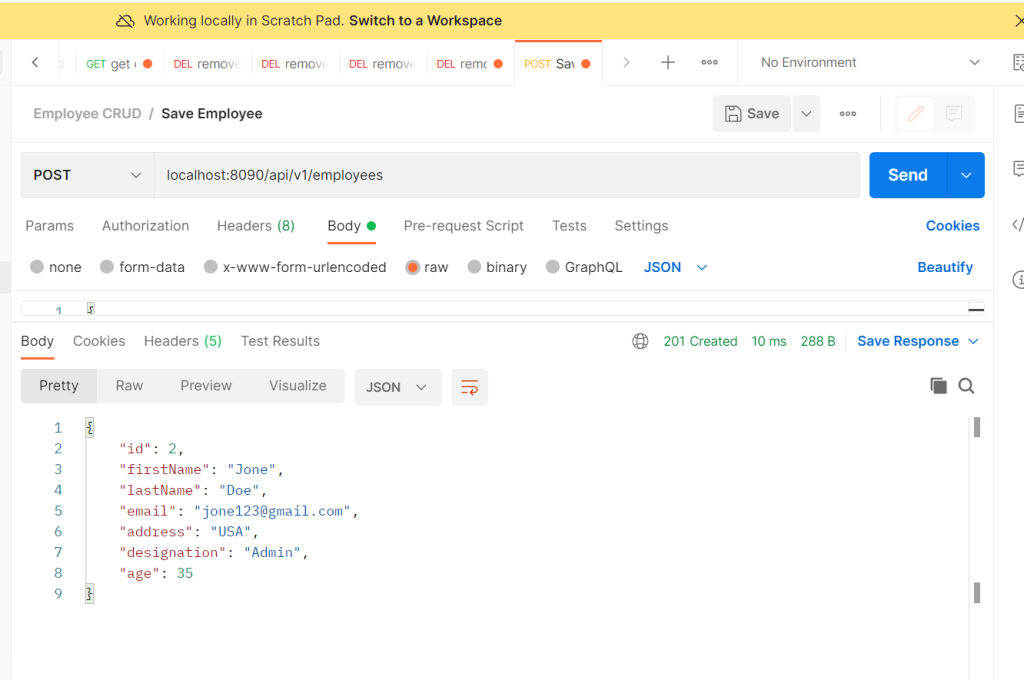
The status code in 201, means the record is being saved to the database.
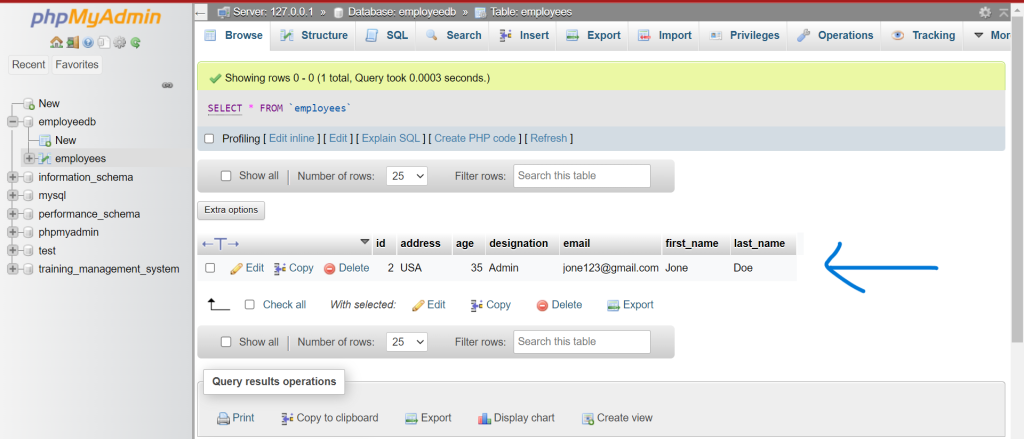
We can verify by checking the record in the MySQL dashboard. I hope you guys enjoyed this article. Thank you. If you face any issues please feel free to comment.