Hello,
Today we will create a spring boot CRUD application. In, this example, we are using the MySQL database to store data, to view and manage the data we will use react Js library in the frontend part. For API testing we will use Postman.
In this article, we will add some database properties to the properties file.
src => main => resources => application.properties
server.port=8090

spring.datasource.url= jdbc:mysql://localhost:3306/employeedb?useSSL=false
spring.datasource.username= root
spring.datasource.password=

spring.jpa.properties.hibernate.dialect= org.hibernate.dialect.MySQL5InnoDBDialect
spring.jpa.hibernate.ddl-auto= update


spring.jpa.show-sql=true
Create Employee Entity
To create Employee Entity, go to the entity package and create Employee.java class. After creating the Employee class add the following fields.
package com.crud.entity;


import javax.persistence.*;

@Entity
@Table(name = "employees")
public class Employee {
    @Id
    @GeneratedValue(strategy = GenerationType.IDENTITY)
    private Long id;

    private String firstName;

    private String lastName;

    private String email;

    private String address;

    private String designation;

    private int age;

    public Employee() {
    }

    public Employee(String firstName, String lastName, String email, String address, String designation, int age) {
        this.firstName = firstName;
        this.lastName = lastName;
        this.email = email;
        this.address = address;
        this.designation = designation;
        this.age = age;
    }

    public Employee(Long id, String firstName, String lastName, String email, String address, String designation, int age) {
        this.id = id;
        this.firstName = firstName;
        this.lastName = lastName;
        this.email = email;
        this.address = address;
        this.designation = designation;
        this.age = age;
    }

    public Long getId() {
        return id;
    }

    public void setId(Long id) {
        this.id = id;
    }

    public String getFirstName() {
        return firstName;
    }

    public void setFirstName(String firstName) {
        this.firstName = firstName;
    }

    public String getLastName() {
        return lastName;
    }

    public void setLastName(String lastName) {
        this.lastName = lastName;
    }

    public String getEmail() {
        return email;
    }

    public void setEmail(String email) {
        this.email = email;
    }

    public String getAddress() {
        return address;
    }

    public void setAddress(String address) {
        this.address = address;
    }

    public String getDesignation() {
        return designation;
    }

    public void setDesignation(String designation) {
        this.designation = designation;
    }

    public int getAge() {
        return age;
    }

    public void setAge(int age) {
        this.age = age;
    }
}
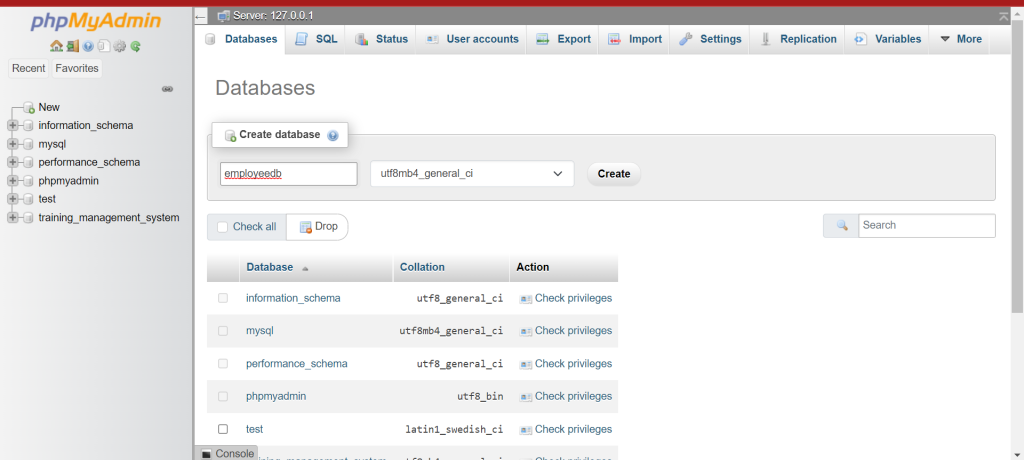
After adding the properties, create the Employee class. Now turn on the xampp application. Open the phpMyAdmin panel and create a database, in my case it’s ’employeedb’. Now run the project.
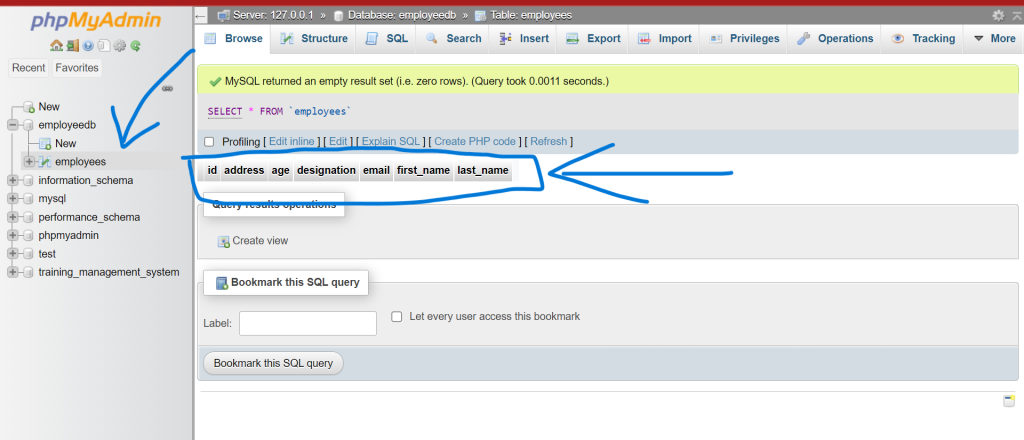
It Will create the ’employes’ table under ’employeedb’.